Installation
Install Wholesale GOAT, create your first form and tier, and add the app to your Online Store.
Follow these steps to get Wholesale GOAT up and running on your store.
1. Install the app
Add the application to your storefront and accept the necessary permissions.
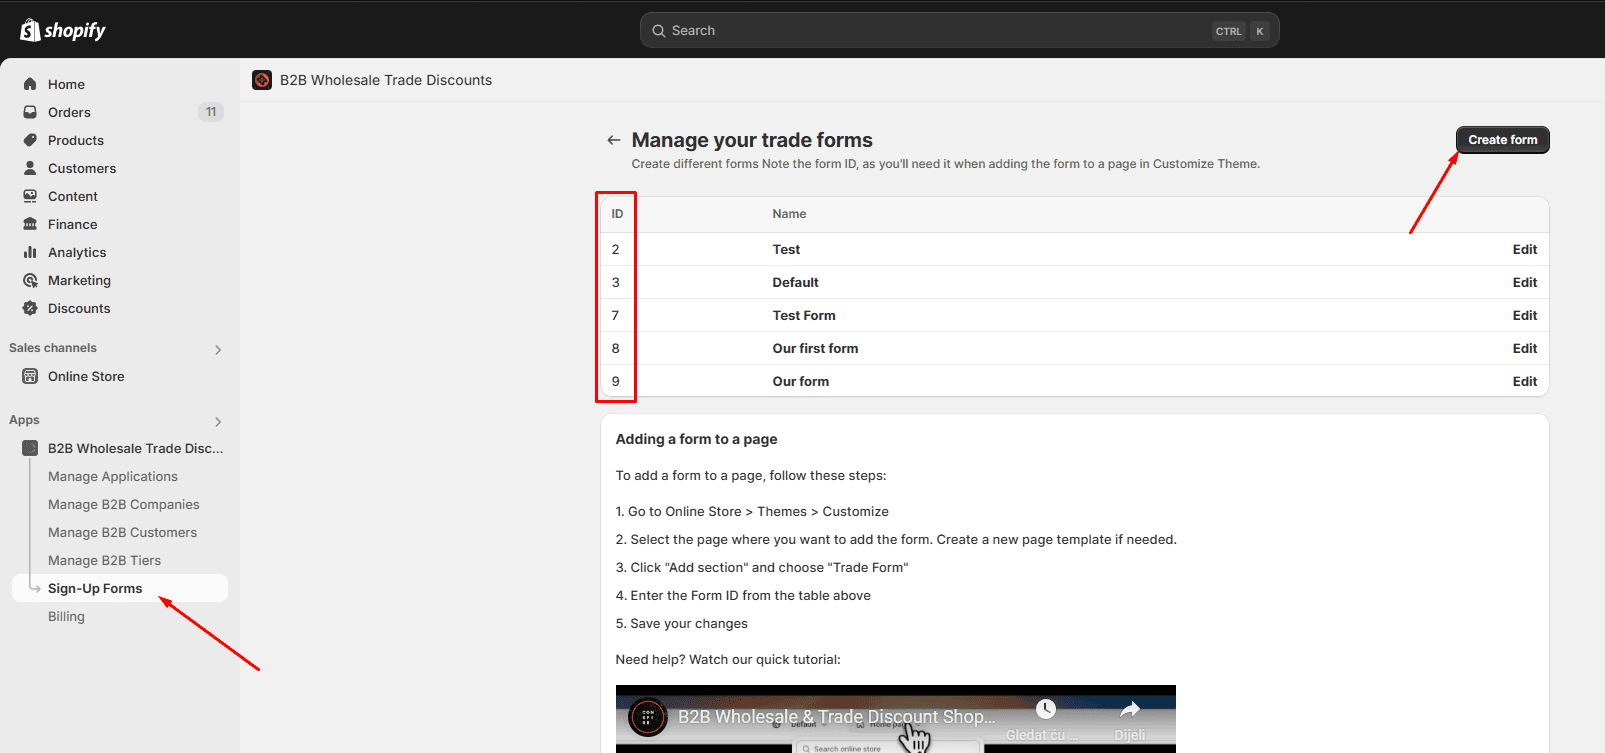
2. Create a trade form
Create a trade form, this is how you'll onboard new applications to join your program. Note the trade form ID, as you'll use this later in Customize Theme.
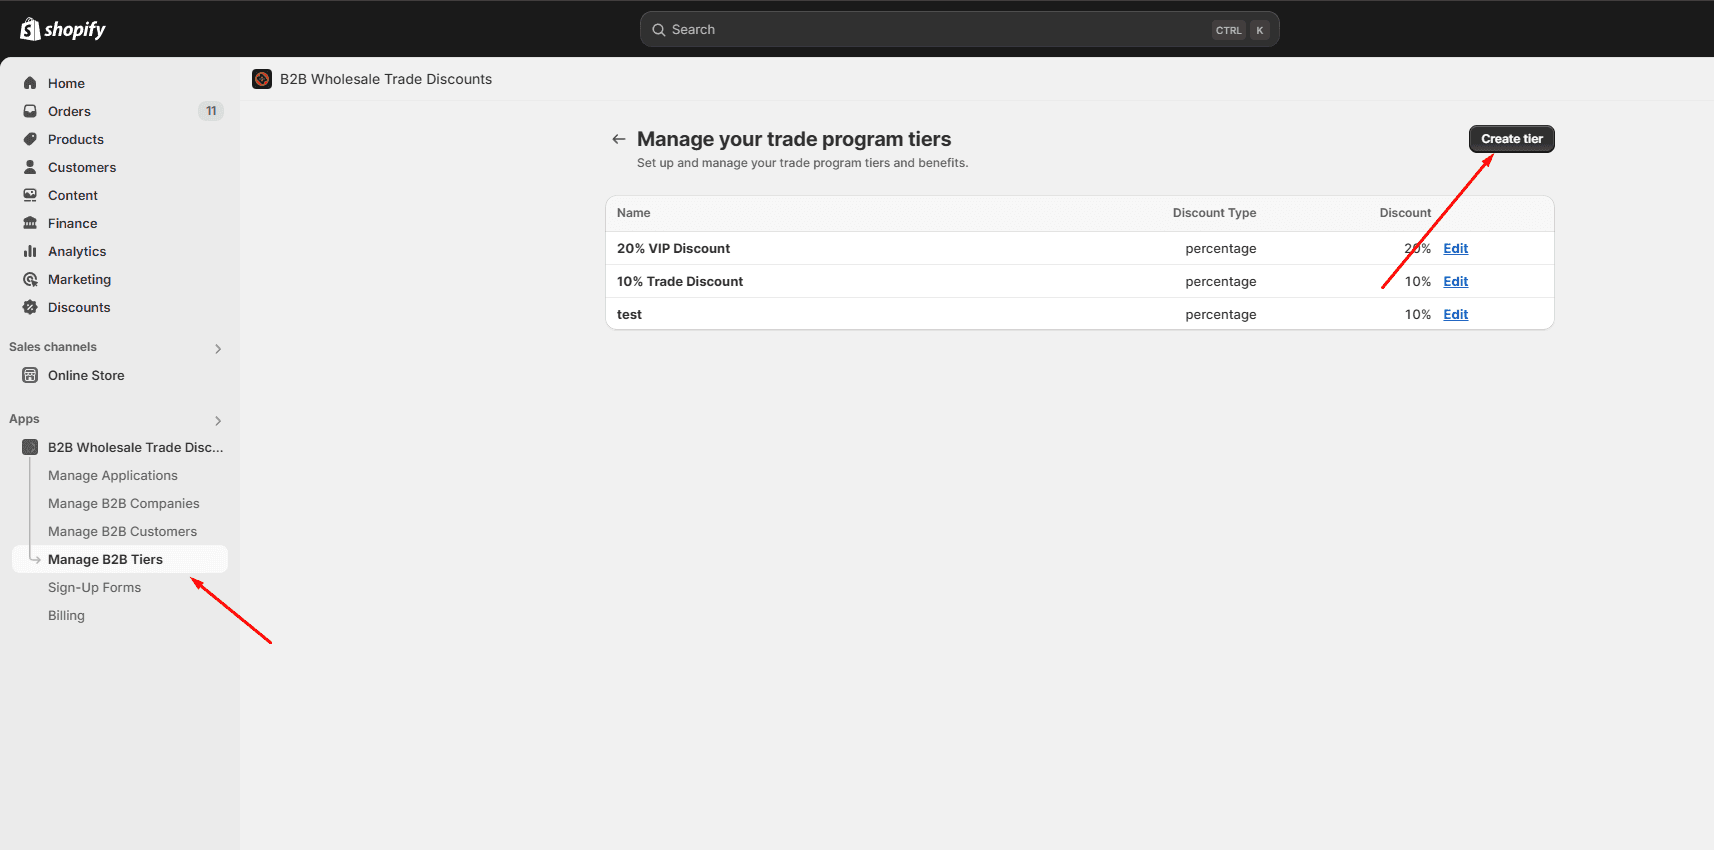
3. Create a trade program tier
Create a trade program tier, this is how you'll assign discounts for various users in your program.
4. Add the application to your Online Store
-
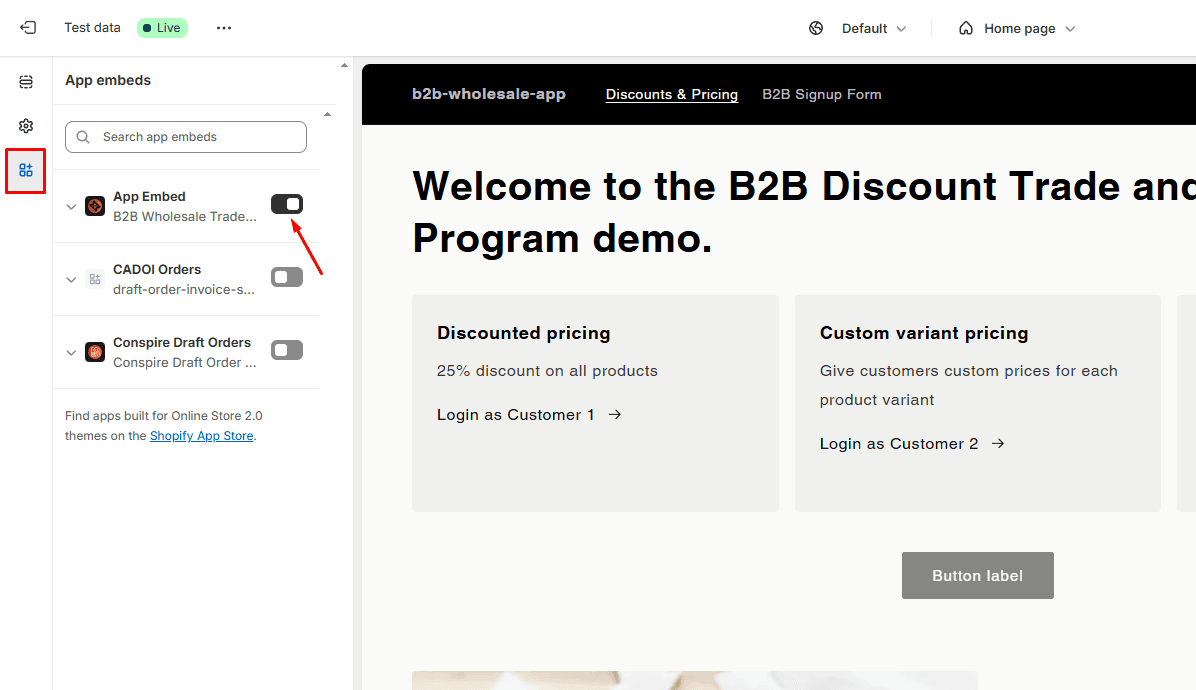
Navigate to Customize Theme and activate the main application embed.
-
While still in Customize Theme, navigate to the page where you want your trade form to live.
Add the app embed block for the Trade Form and enter the form ID you'd like on this page.
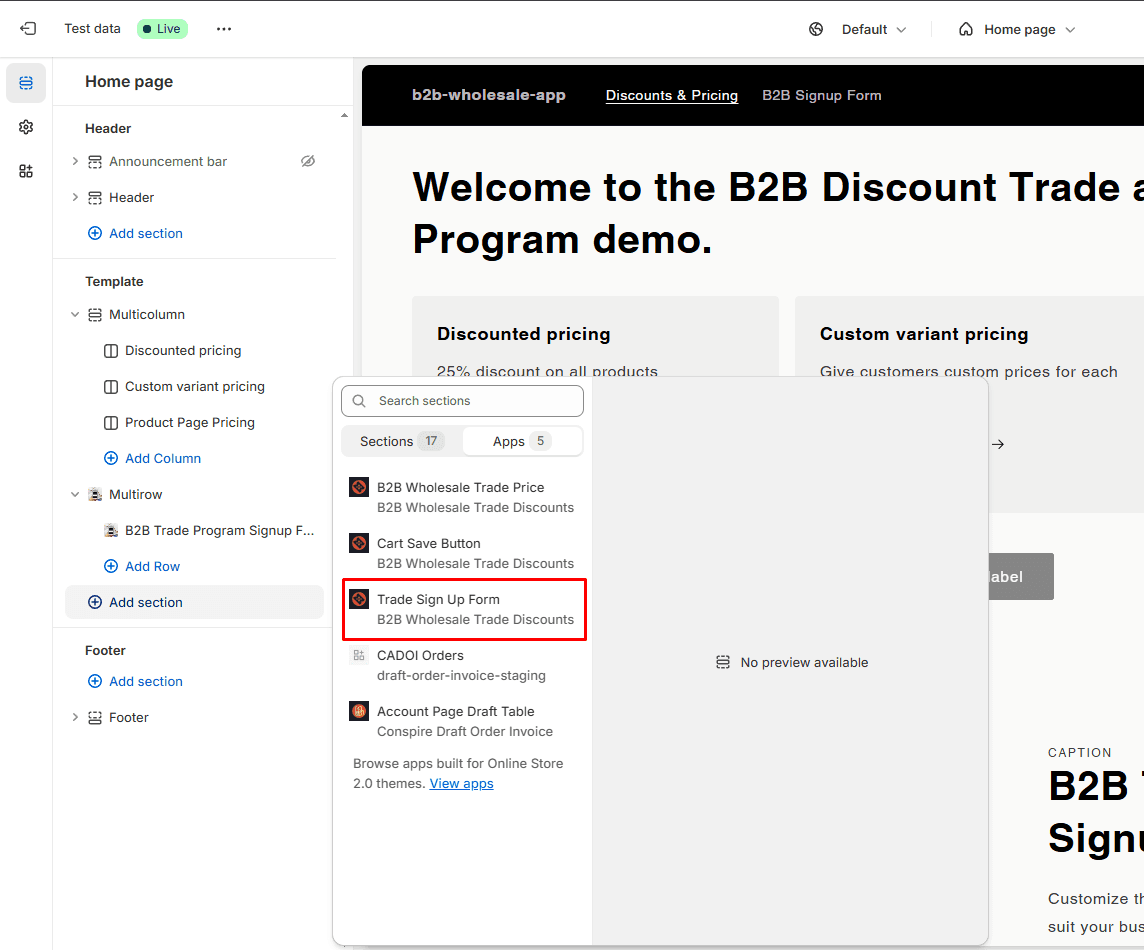
Enter the form ID you'd like on this page (IDs are visible in step 2).
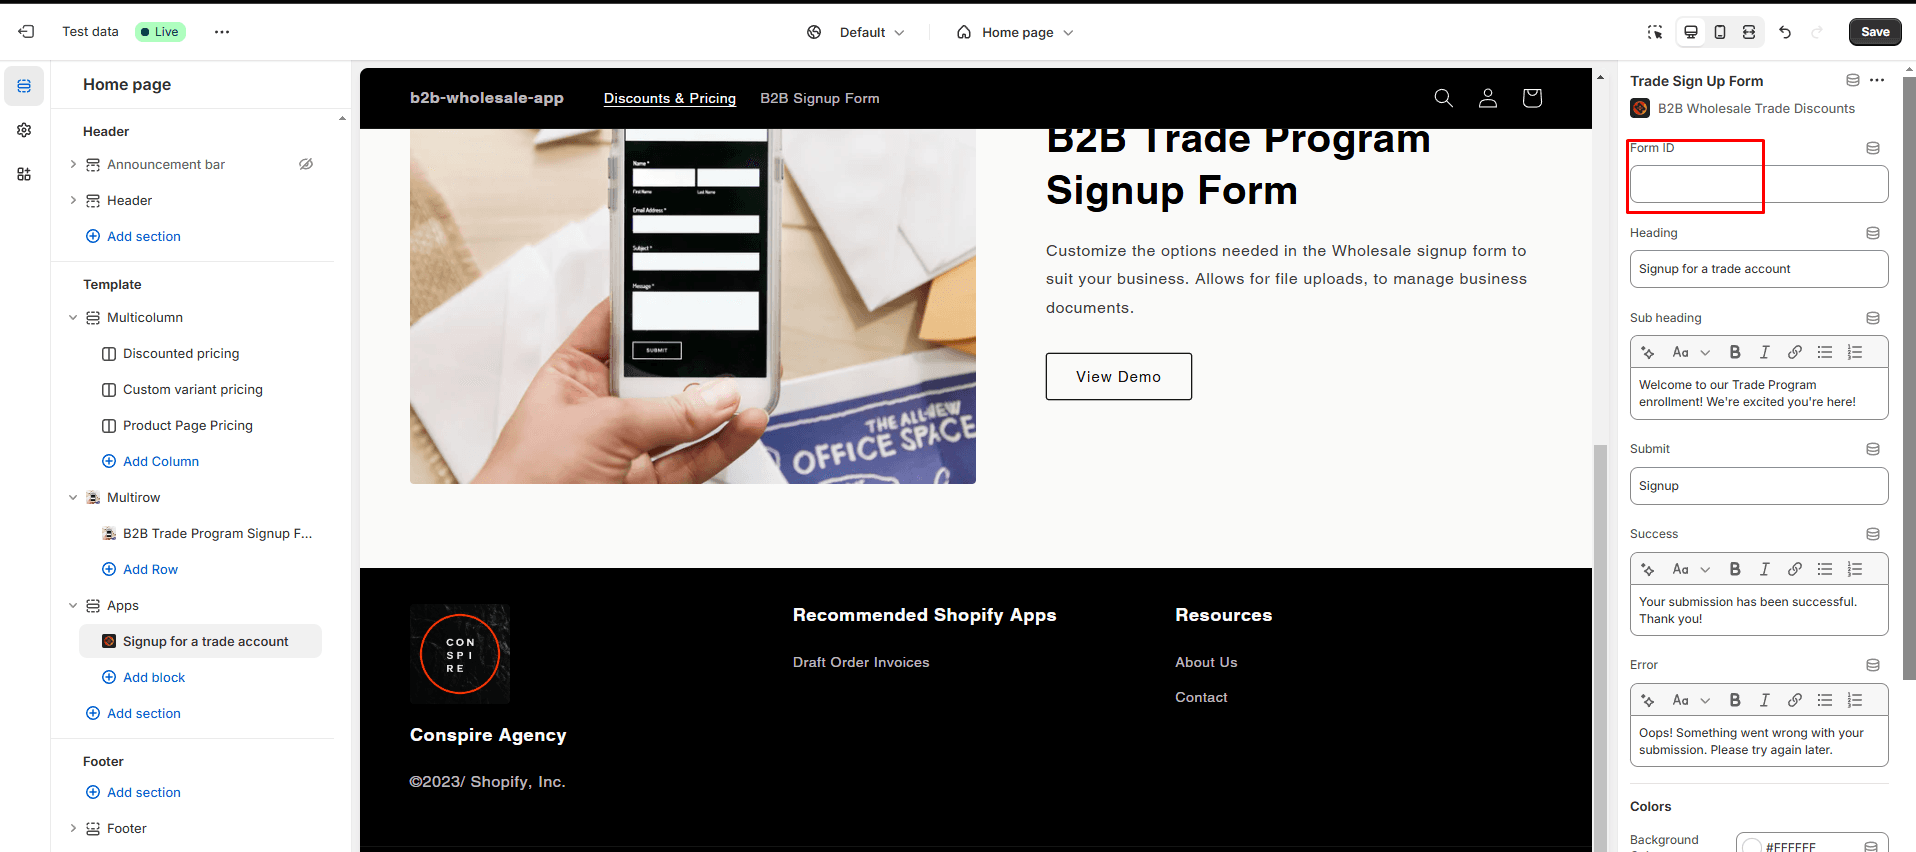
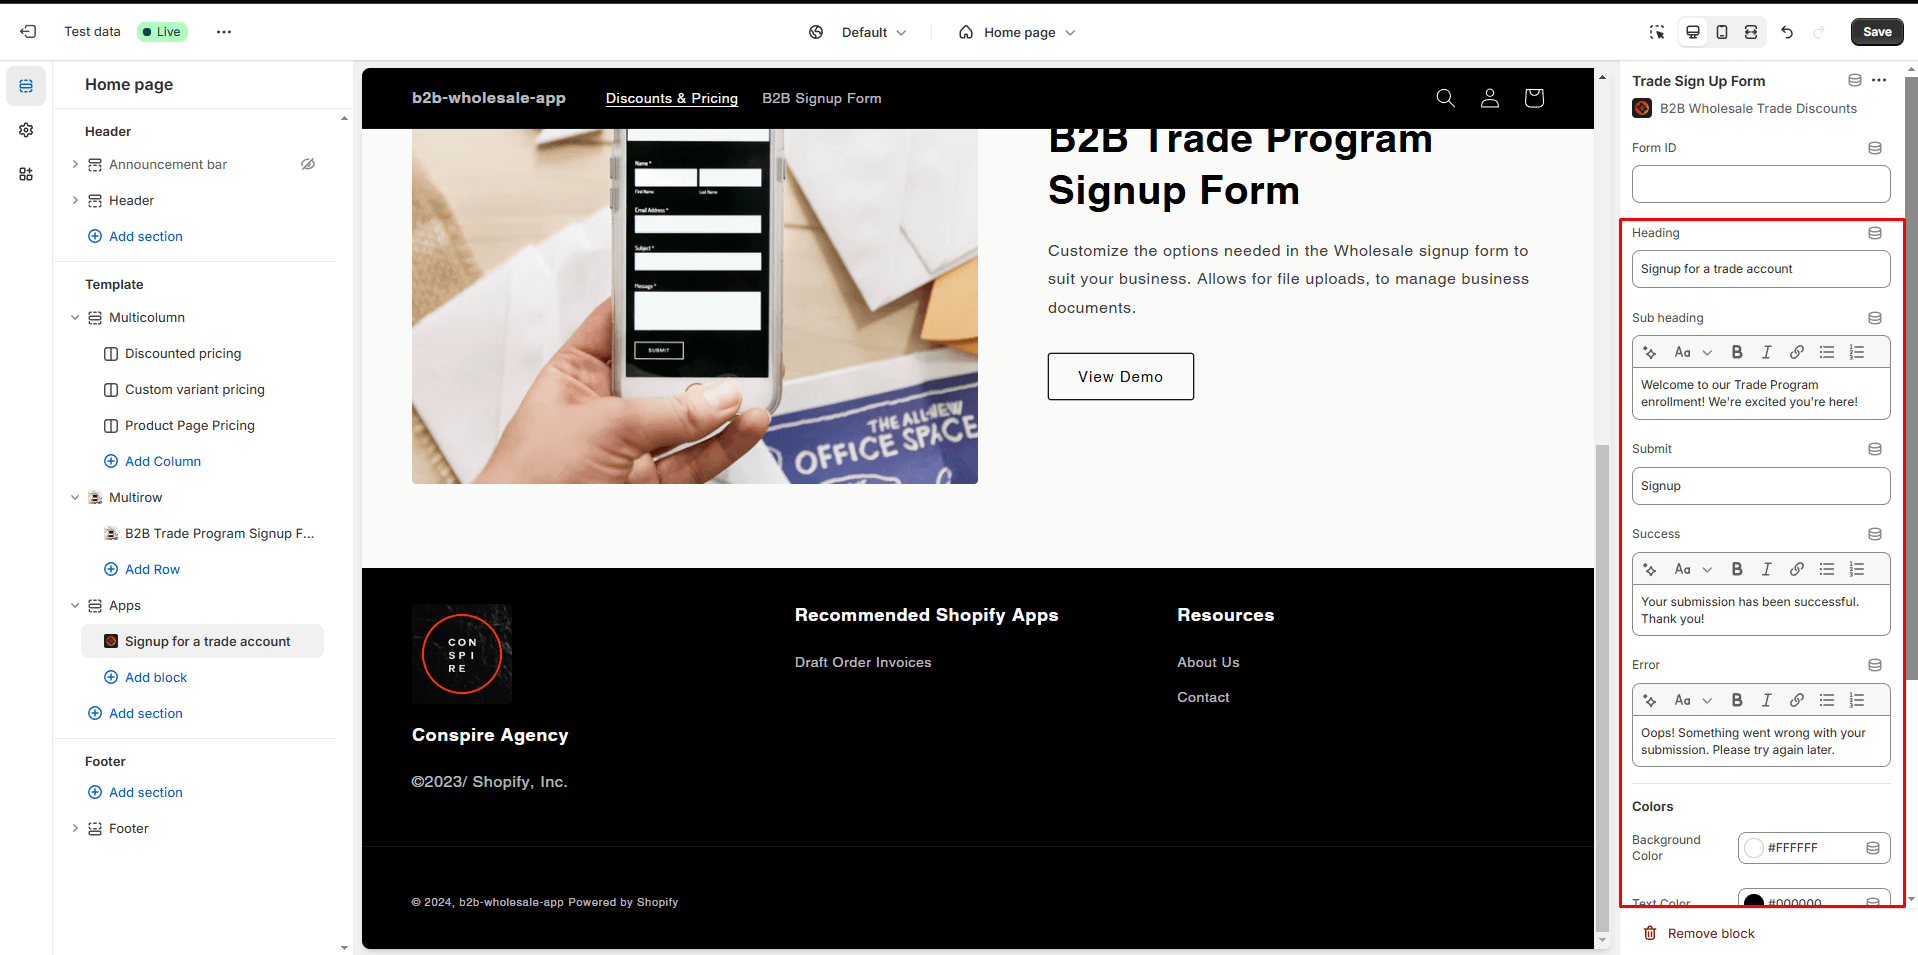
Fill out any other fields for form title, success message etc. you'd like to change.
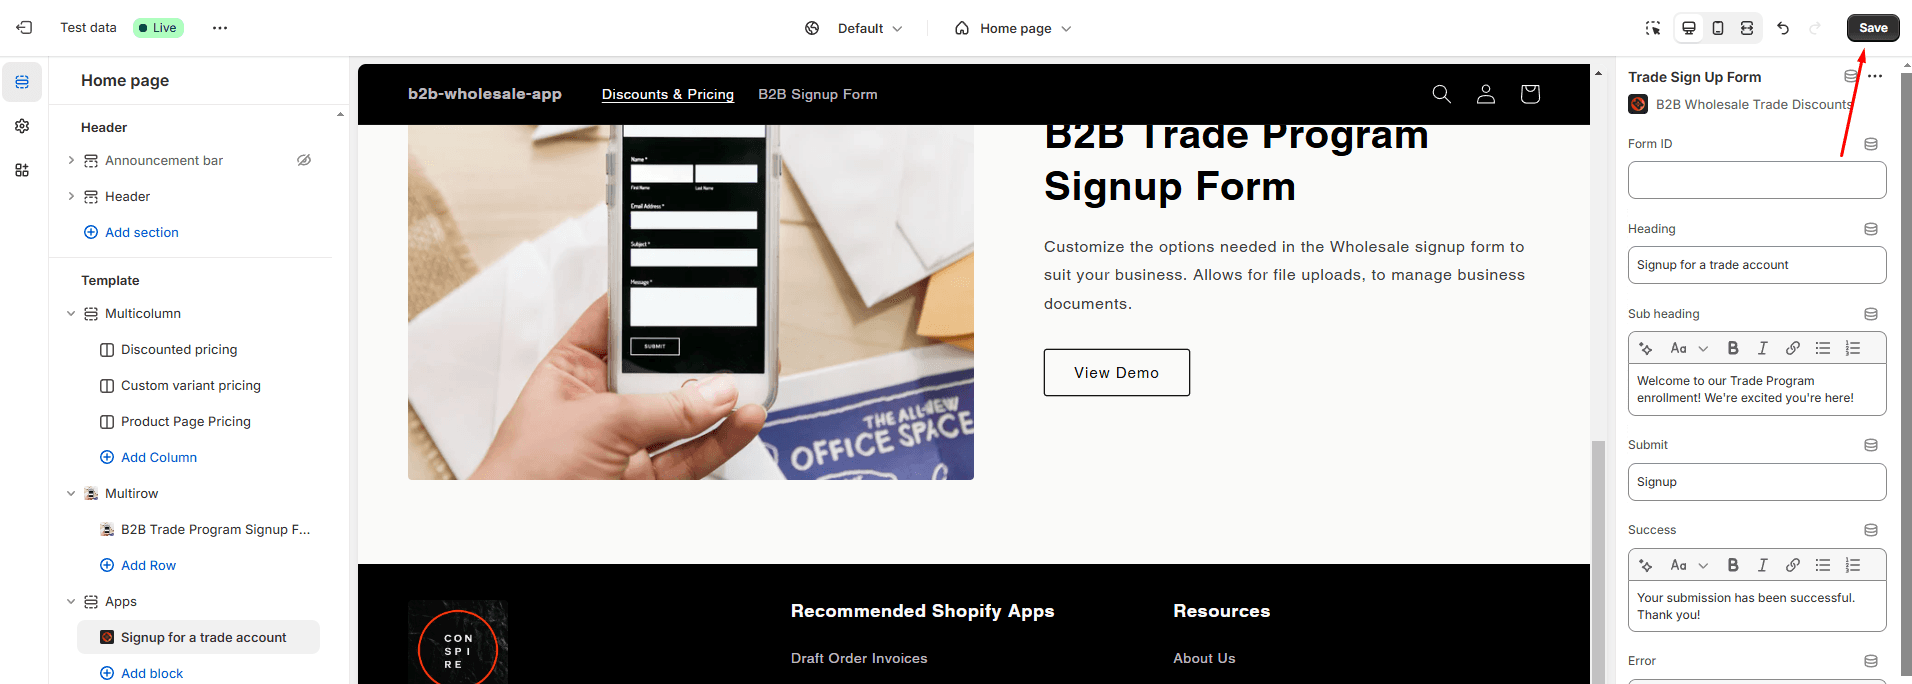
Hit save, you should now see the form on the page.
-
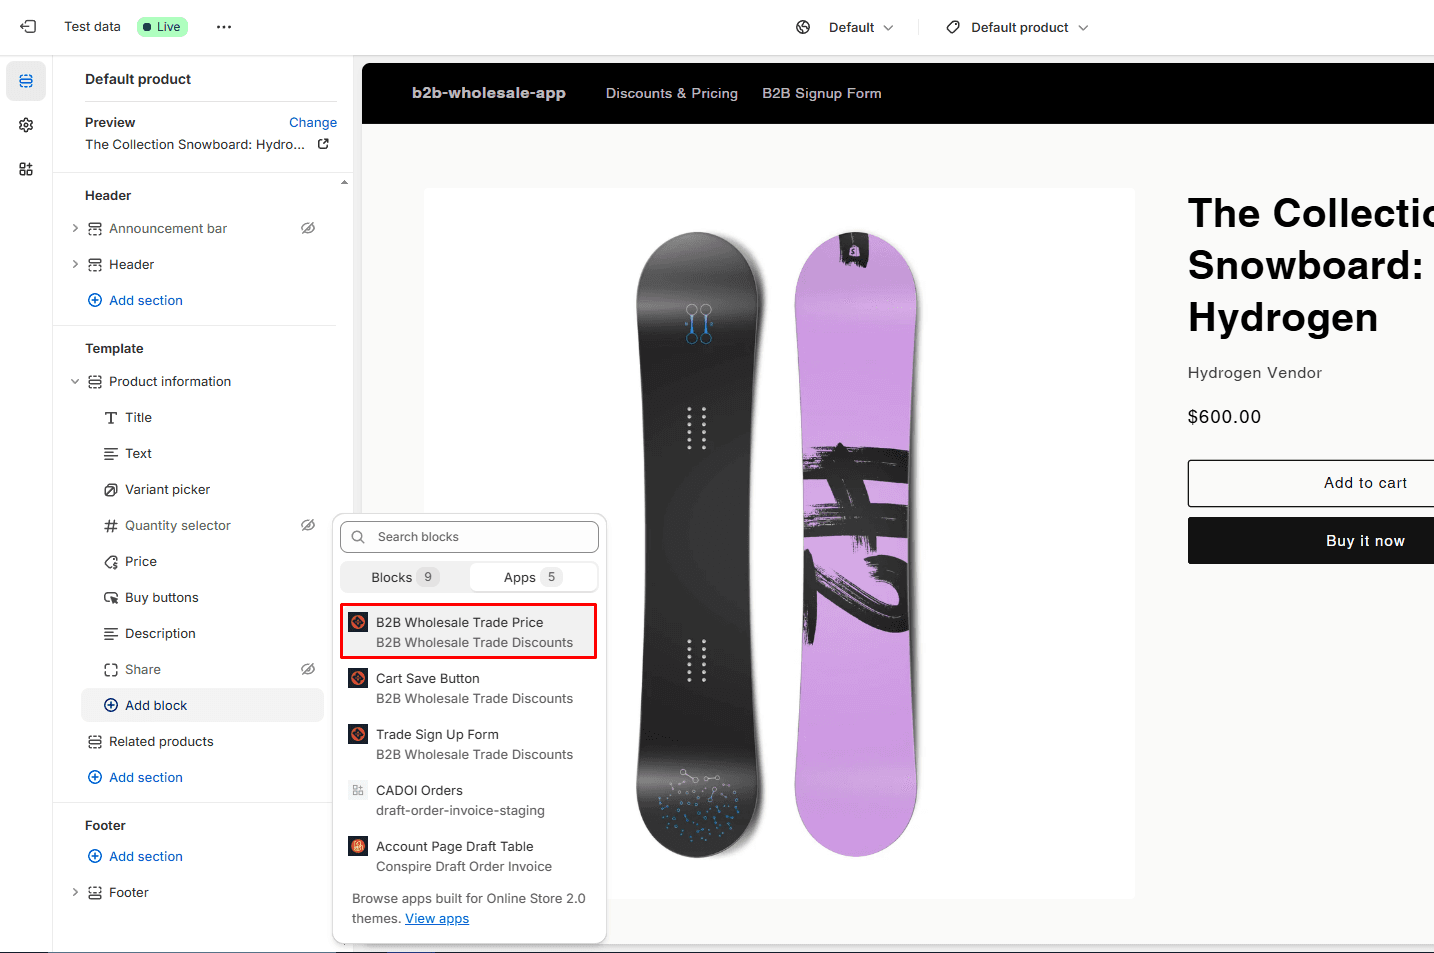
(Optional) Navigate to your product pages. Here you can add the app block for Trade Price, which will display discounted pricing based on customer tier on your product pages.
5. Start accepting submissions
Go ahead and fill out a test submission to make sure your form is working.
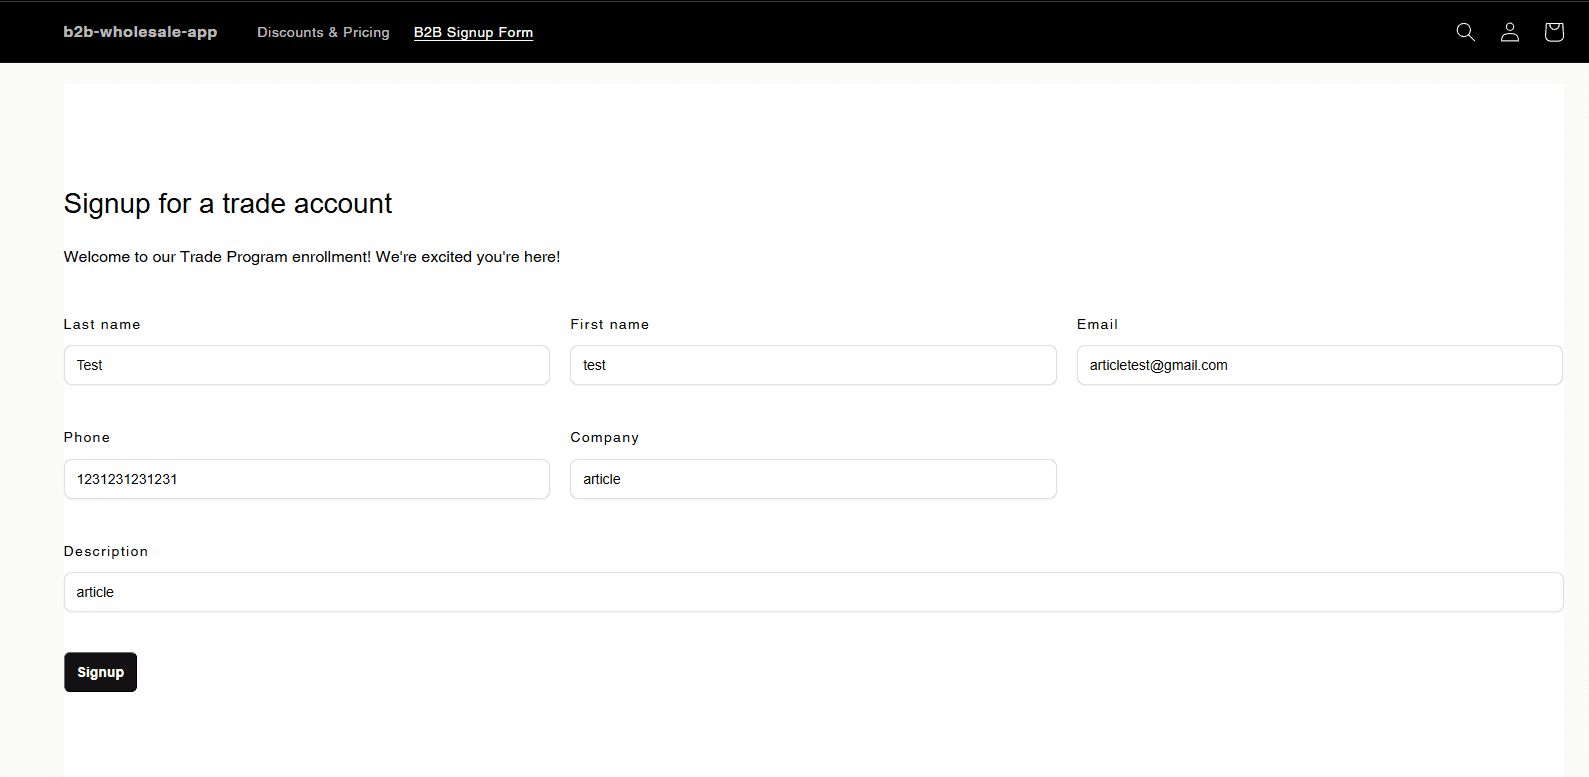
After you submit you can go ahead and navigate back to the application, where you should see your new application appear.
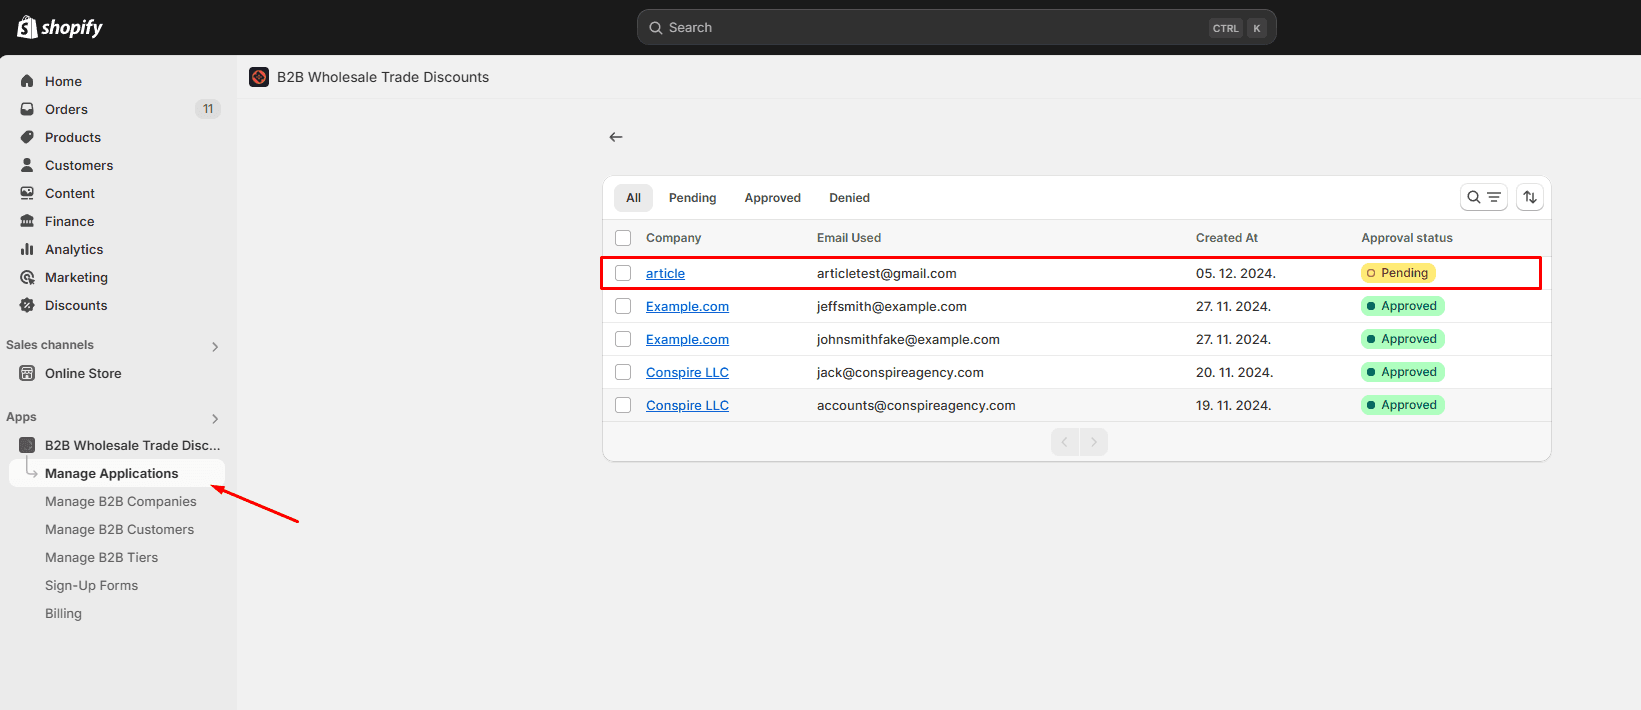
6. Review the application
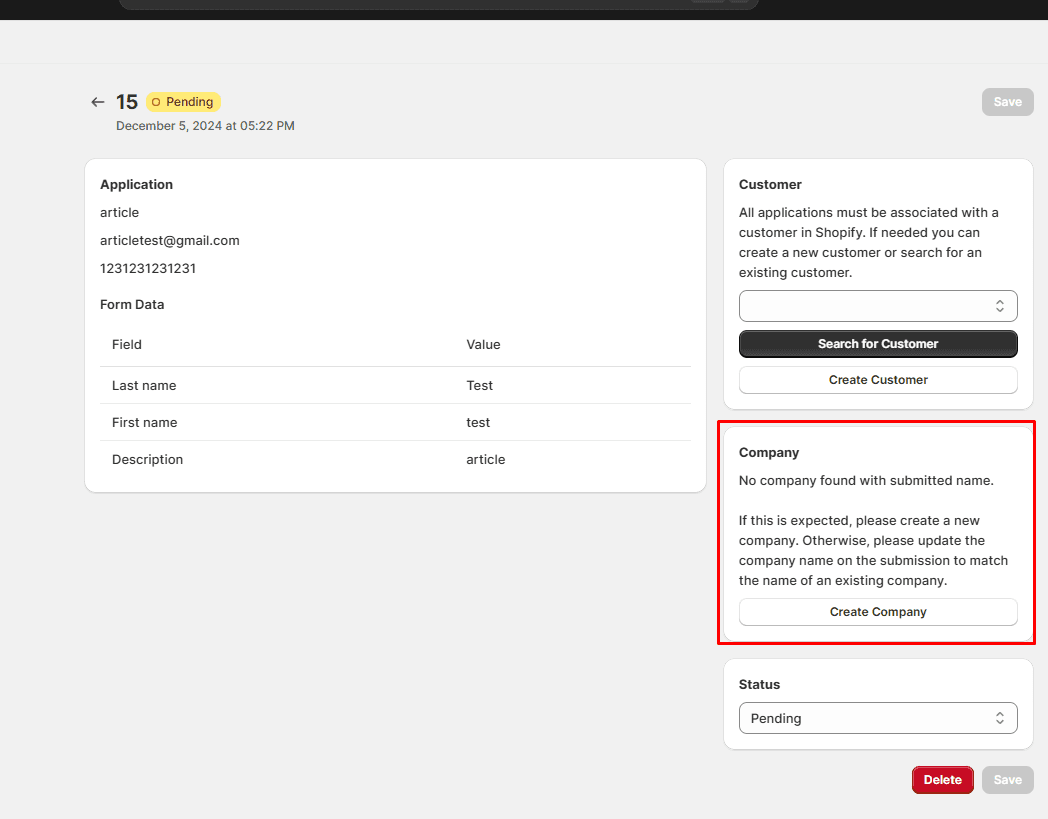
In the application detail you can see all the information submitted in the application form. All applications must be assigned to a customer in Shopify.
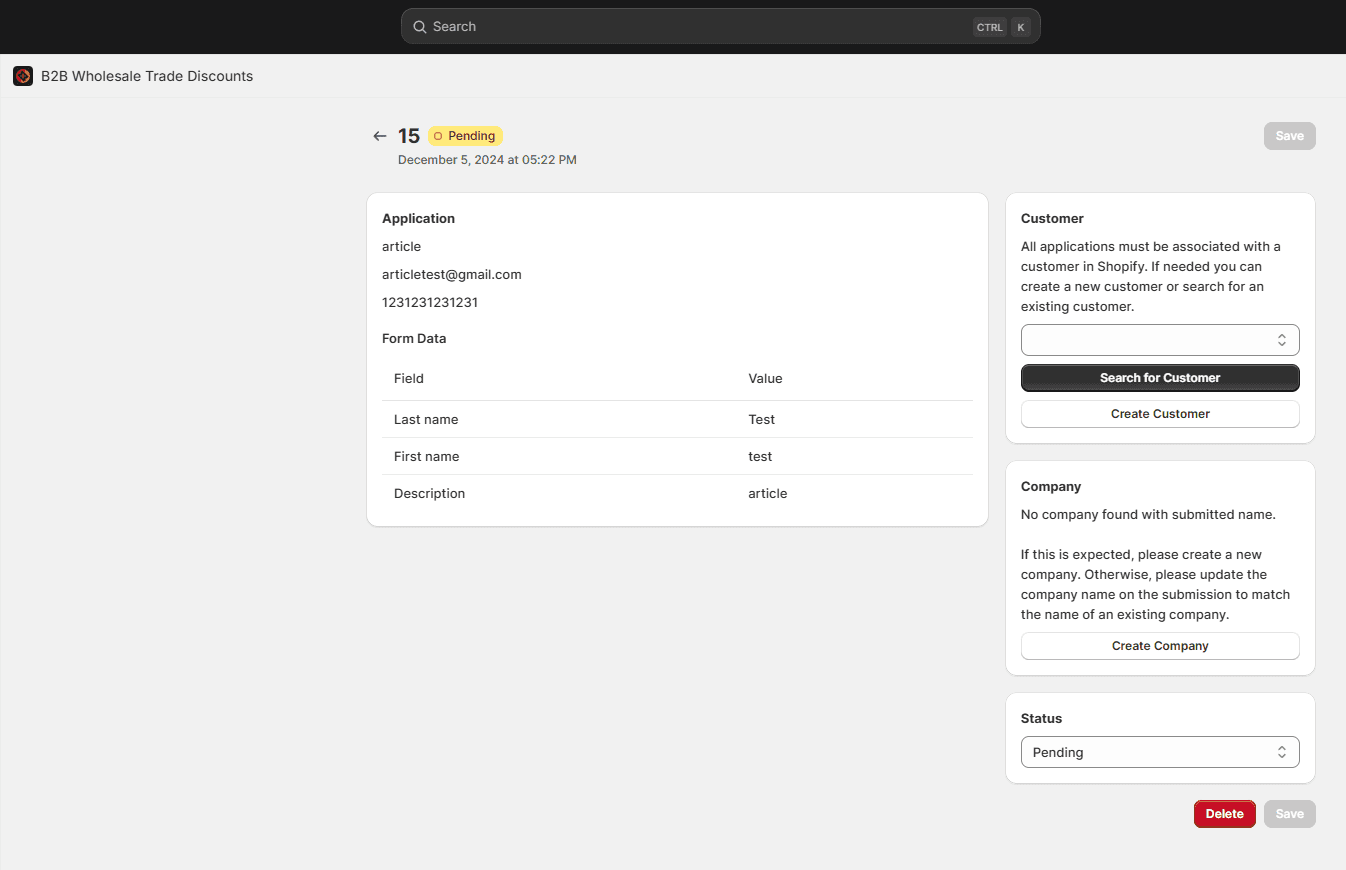
It will try to find a customer in Shopify as provided in the mandatory email field of the form. If no customer exists, you'll want to create a customer and then assign it to the application.
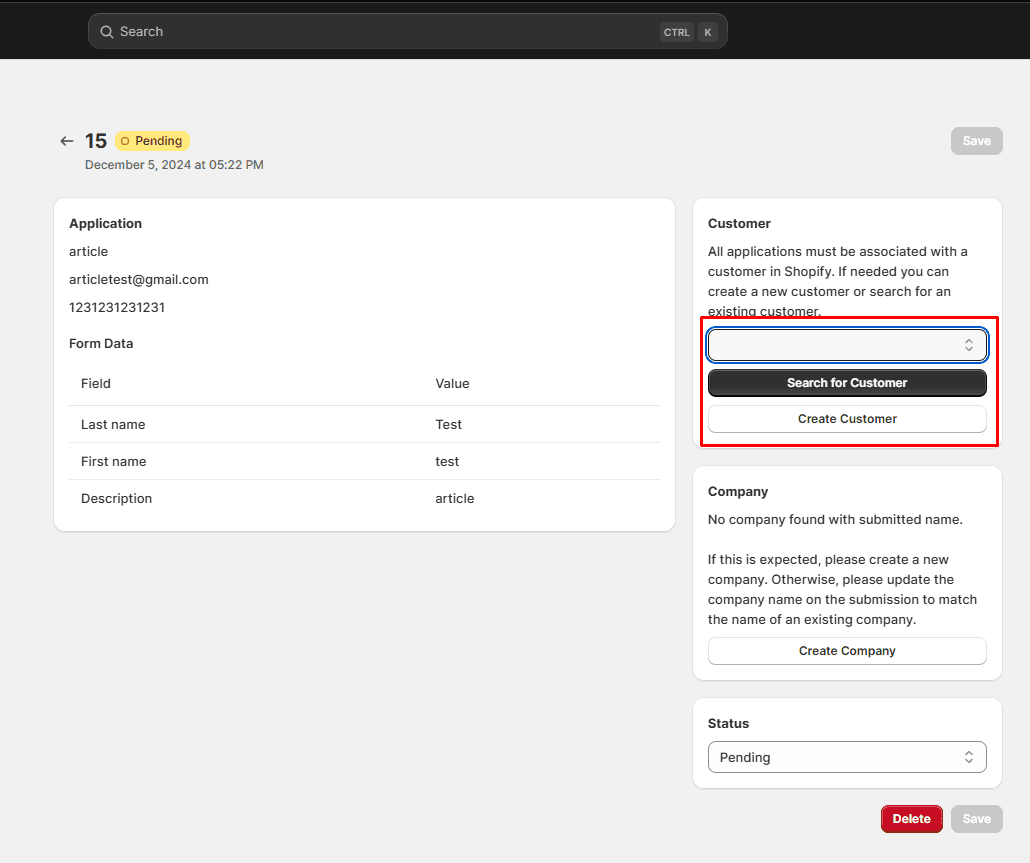
Assigning a company to the submission is optional, but helpful in managing Company teams. This way you can add additional users and apply discounts plus tax exemption status in bulk without additional applications being required.
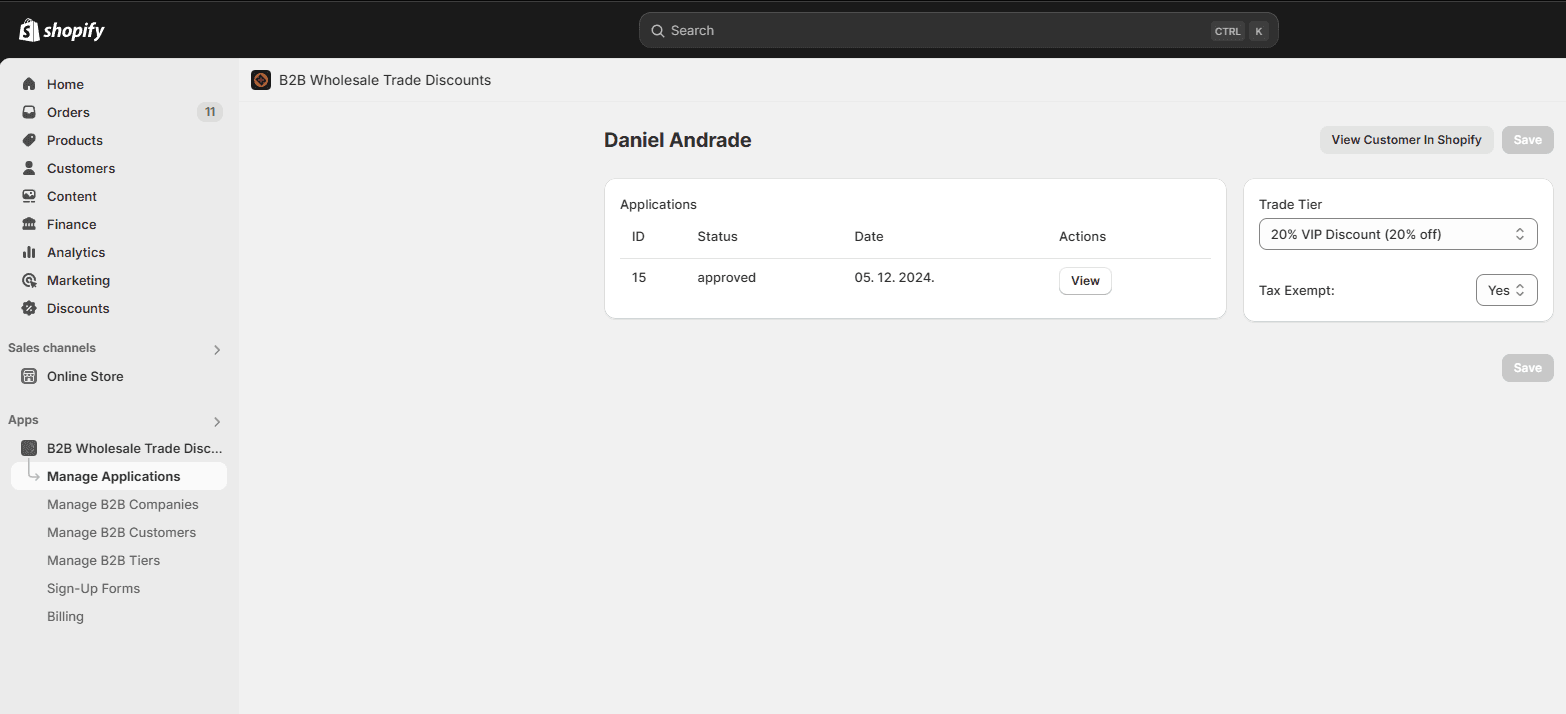
Once you've approved the form, you'll be taken to either the company detail page or customer detail page in the app. Here you can assign a trade tier for discounts and tax exempt status.
That's it! You're now ready to start building out your trade program.
If you need any help or are looking to migrate from Shopify Plus B2B, don't hesitate to reach out to our team at hello@conspireagency.com.
Wholesale GOAT Documentation
Documentation for Wholesale GOAT: B2B Pricing, the Shopify app for wholesale pricing, trade programs, sign-up forms and customer discounts.
Creating tiers to manage customer discounts & settings
Use tiers to provide different discounts and settings to different groups of customers.